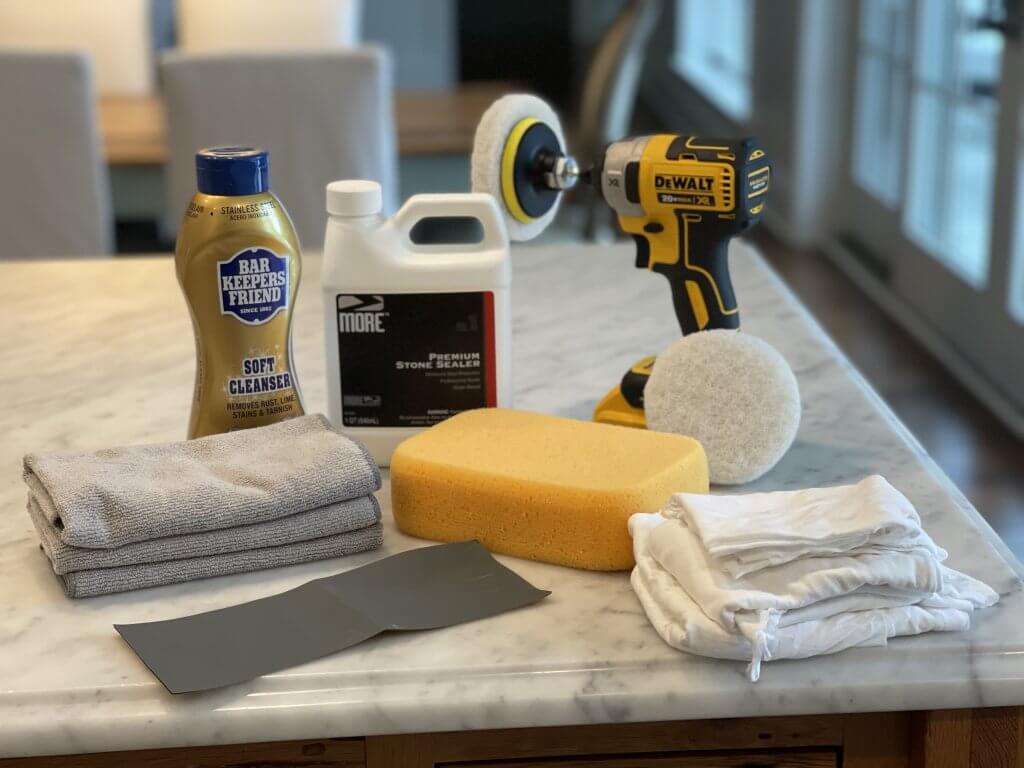
We recently took a couple of hours to clean and seal our natural stone (Carrara Mable) countertops! There were installed six years ago and I’ve been worried about spilling something and leaving a permanent stain because we are really messy cooks.
This blog post is all about how to clean and seal natural stone countertops.
Below, I will tell you step-by-step what Tony and I did to clean and seal our Carrara marble countertops. I’m not telling you this is how you should clean and seal your Carrara marble tops, I’m telling you this is how I did it, what worked for me. I’m responsible for my countertops, and you are responsible for your countertops.
- I removed everything from the countertops and made sure we had a clear path around the area we would be working.
- I gathered the following items:

1000 grit sandpaper
Vacuum Cleaner
Liquid Bar Keepers Friend
Hot water with a squirt of dish detergent
Clean Microfiber Cloths
Clean Cotton Dishtowels
More Premium Stone Sealer
Drill Scrub Pads
DeWalt Cordless Drill
Large Clean Sponge
Clean White Cotten T-shirt rags
- Tony took the 1000 grit sandpaper and VERY LIGHTLY rubbed it over chips on the countertop edge. The end of my island faces the stove, so I always set things just out of the oven there. Over time, I’ve hit the edge and caused it to have a few minor nicks on the surface that were a little sharp. Before I sealed it, I wanted to to try to smooth those down. I swept up the dust from this with the vacuum.
- We squeezed out a line of Bar Keepers friend down the center of the countertop. Then using the drill scrub pads and a DeWalt cordless drill, proceeded to rub the Bar Keeper’s friend all over the tops. Be careful not to let the drill go too fast; it will sling Bar Keepers all over our kitchen! We purposely did not press down with the drill. Bar Keeper’s nor the pads should scratch the marble. We didn’t want to get too aggressive.
- We rinsed the countertops really well with warm soapy water and a microfiber cloth. Then we dried them off with clean towels. Finally, we ran our hands over the countertops to make sure there was no residue left. They were so much smoother and felt so great at this point!
- Following the directions on the back of the More Premium Stone sealer bottle and using the large sponge, we proceeded to seal the entire countertops. I followed behind Tony and wiped up any drips on the floor and on the bottom edge of the countertop, so two people working is better than one.
- We applied two coats of sealer. Again, following the directions on the back of the More Premium Stone sealer bottle. I do wish instead of waiting 15 mins to let the second coat sit and soak in, I wish I had only waited 10 mins. Some of the sealer started drying on the countertops, and you do NOT want that to happen. We were able to moisten the end of our white cotton t-shirt rags and rub really hard and get the nearly dried sealer marks off of the countertops. But only waiting 10 minutes would have been preferable.
Tips:
- We both really liked the More Stone Sealer because it was easy to clean up and didn’t put off harsh fumes.
- If you have a lot of countertop space, it would be nice to have a second person assisting.
- We did this after dinner so that it could dry overnight. We did use the tops the next day, but lightly and carefully. We really made sure not to spill anything on them.
- After 24 hours, I put everything back on the countertops.
- After 24 hours, sprinkle some water on your tops and see how it beads up!
This blog post is all about how I cleaned and sealed my natural stone countertops.
If you want to upgrade your bath vanity tops to natural stone, check out this blog post I wrote about the 6 Rules for Buying stone vanity tops!
